
Looking at the intricate details of the world through the lens of a microscope is a fascinating and fun experience, but you don’t need to limit yourself to the prepared slides that come with it — making your own microscope slides can be just as fun and extremely rewarding.
You have a choice of temporary or permanent, dry or wet mounts, depending on the specimen you choose to observe. It’s also important to consider how to keep yourselves safe: plastic materials and tools may be better for children, and biological matter needs to be cleaned and disposed of adequately, to prevent the transfer of harmful pathogens.
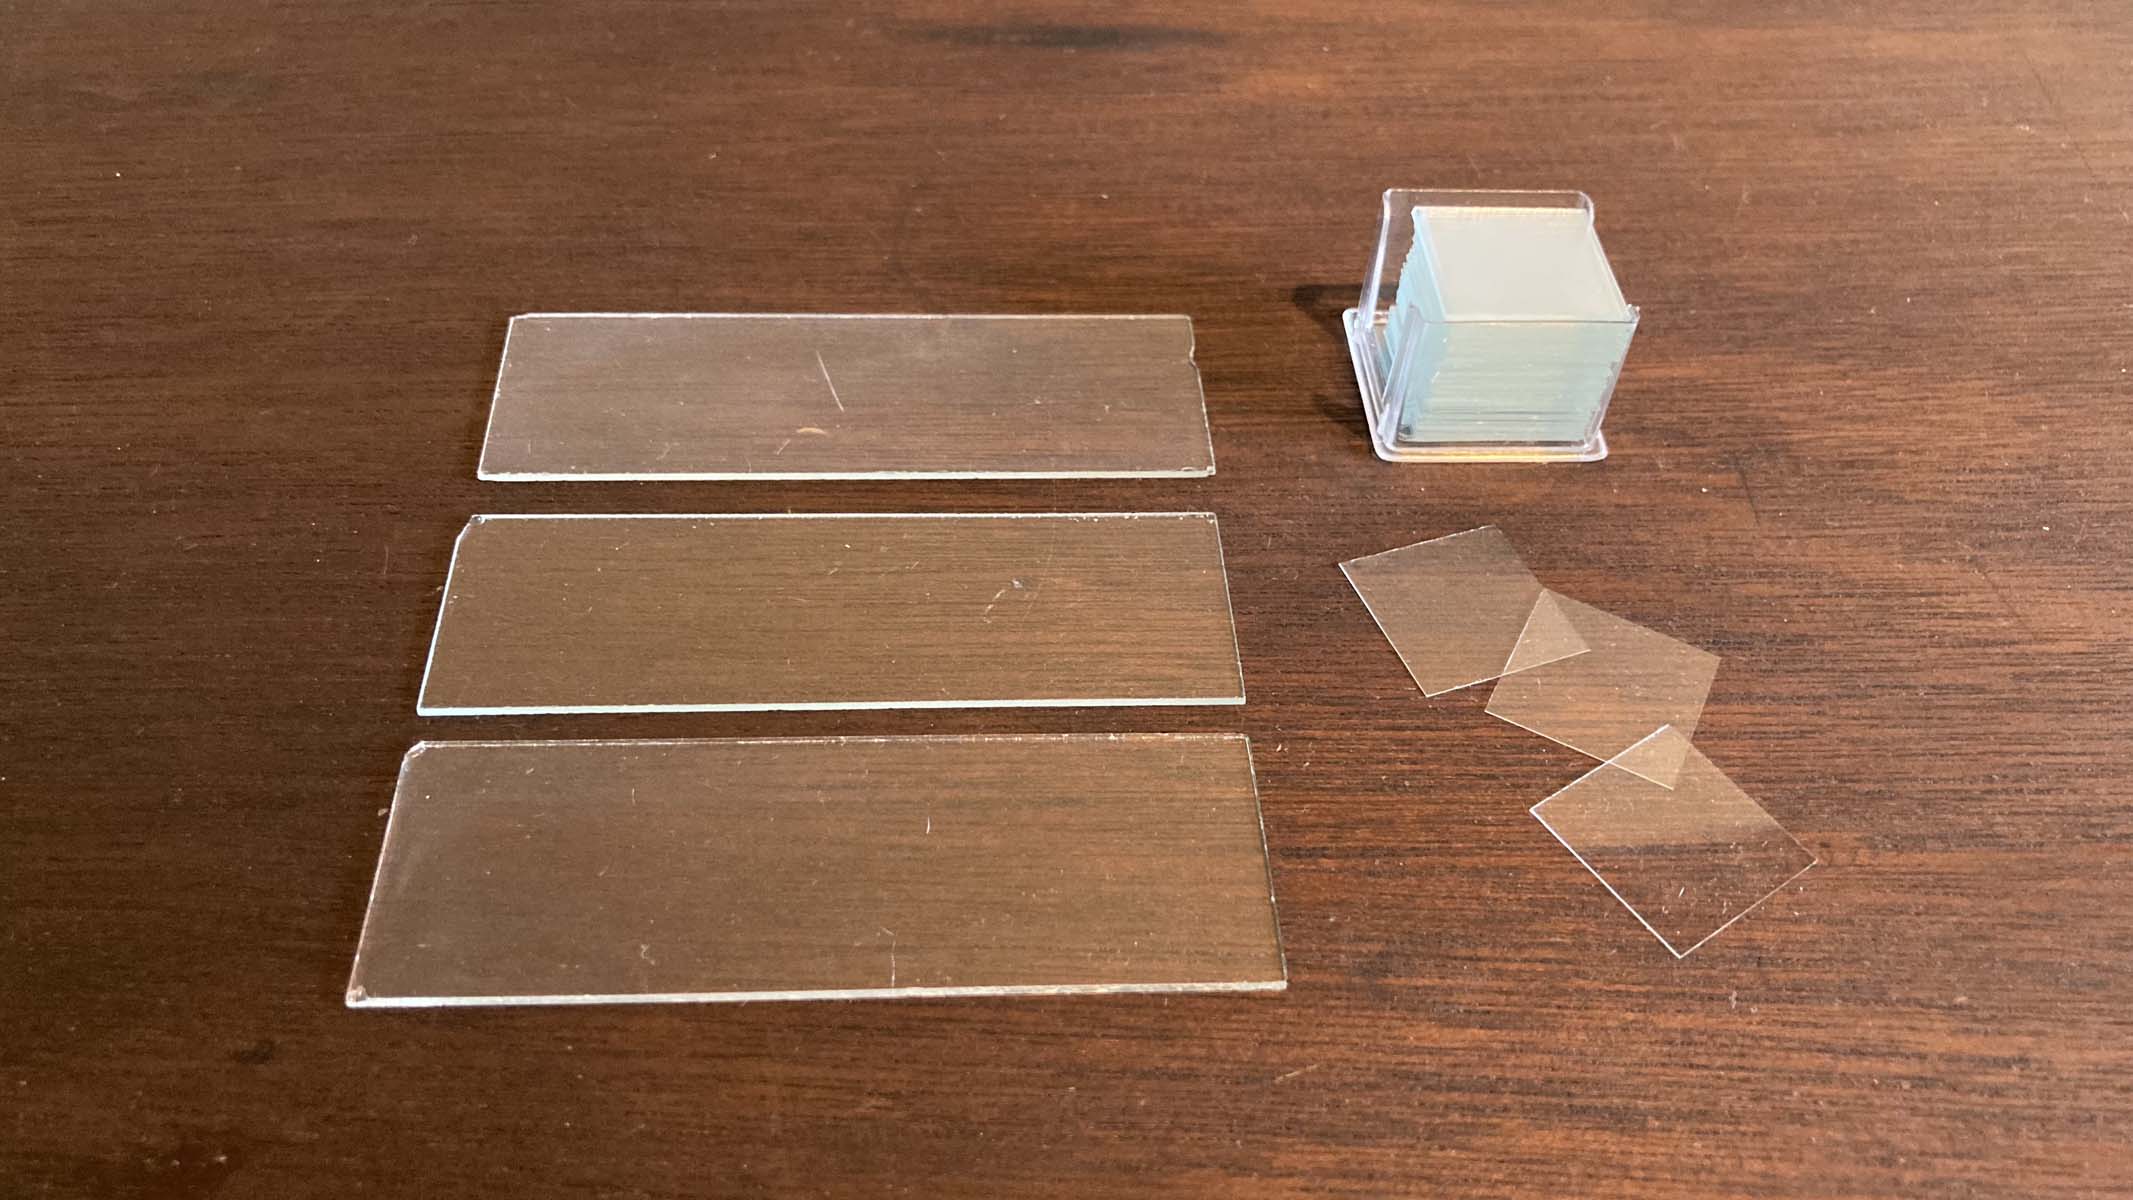
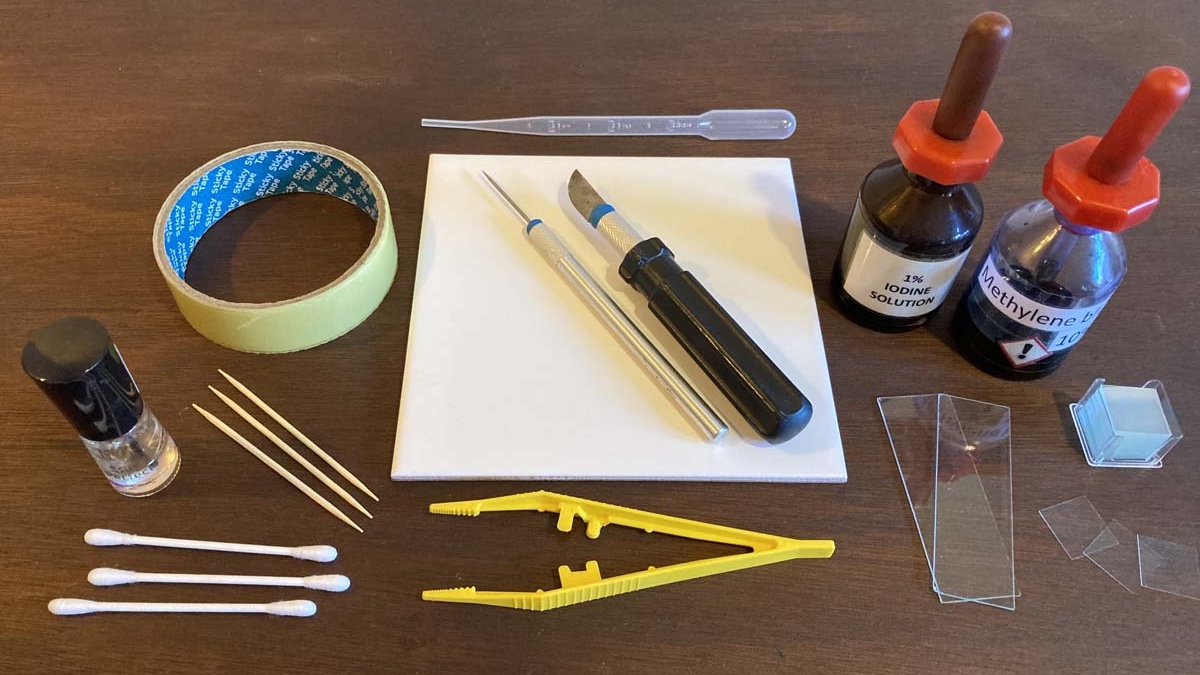
To get you started, once you’ve bought one of the best microscopes for kids or best microscopes for students, a well-stocked slide equipment box should include the following items: Ground glass slides, depression concave well slides, cover slips, ceramic tile, knife, pipette, tweezers, mounted needle, Scotch tape, clear nail varnish, beaker, cotton buds, cocktail sticks, iodine, methylene blue, eosin, glycerine, disinfectant, fine permanent marker.
But also bear in mind that many samples can be mounted simply, without any specialist equipment at all.
Which type of slide is needed?
When deciding which slides are right for your particular needs, you first need to consider who will be using them, which specimens are likely to be examined and the cost.
Plastic slides have the benefit of being cheaper and less hazardous than glass slides, so are more commonly used by younger children with the best microscopes for kids. Plastic is impact-resistant, which means it can withstand being dropped or knocked. But unfortunately, it is also more easily scratched and is prone to warping.
Conversely, glass slides are brittle and are a cutting hazard once broken. However, due to the superior optical quality, clearer images, durability and chemical resistance, glass is the preferred slide choice for most microscopy projects; these are an excellent option for home or education purposes. The best ones will come pre-cleaned.
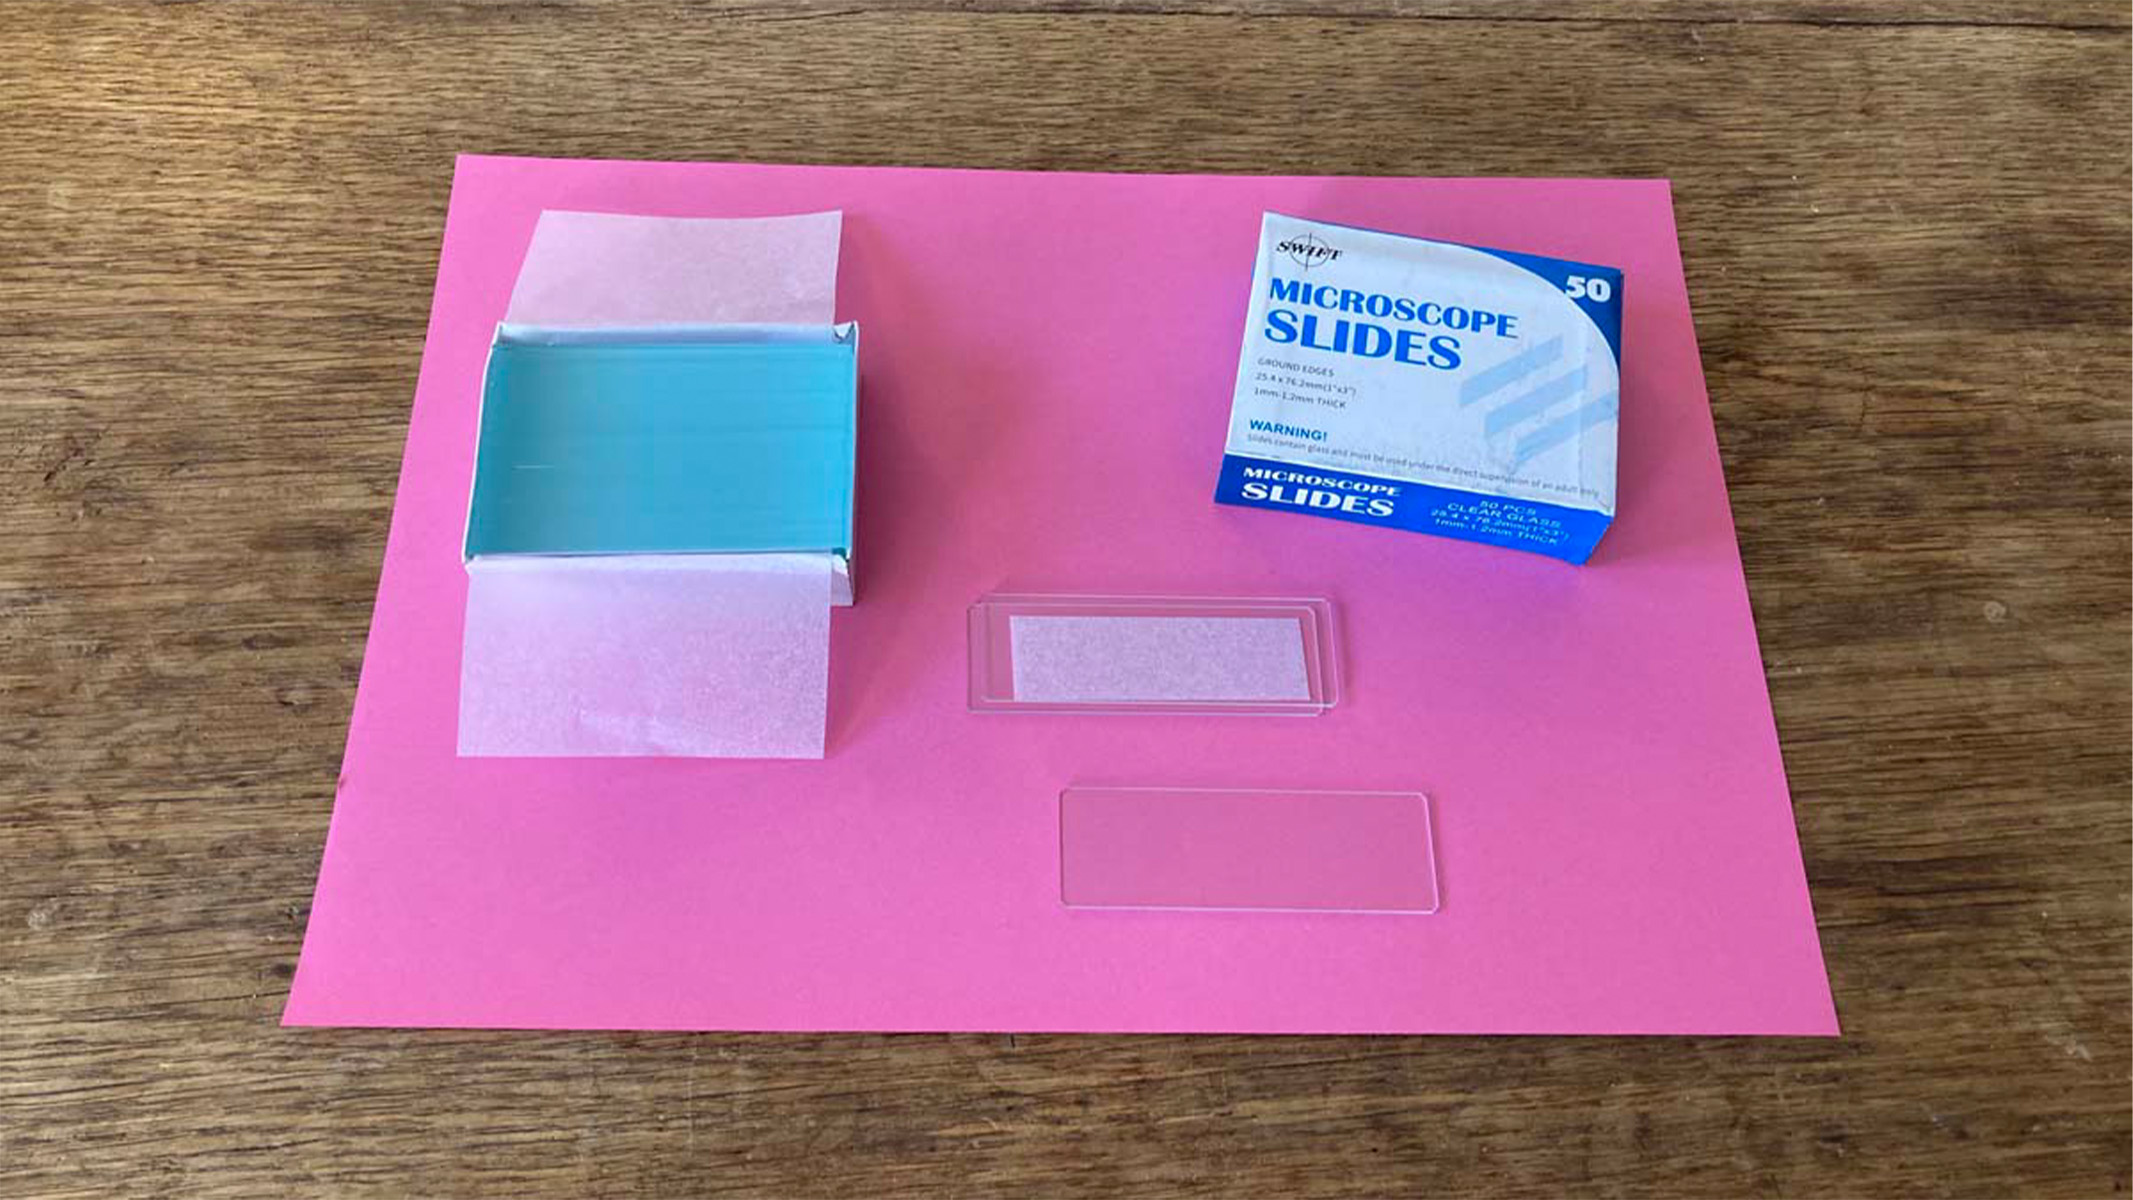
Choose premium quality ground glass slides, rather than cut glass slides, for smoother edges, which are less likely to chip and cause cuts. For an even safer alternative, Swift sells pre-cleaned ground glass slides with the corners taken off, ground to 45o.
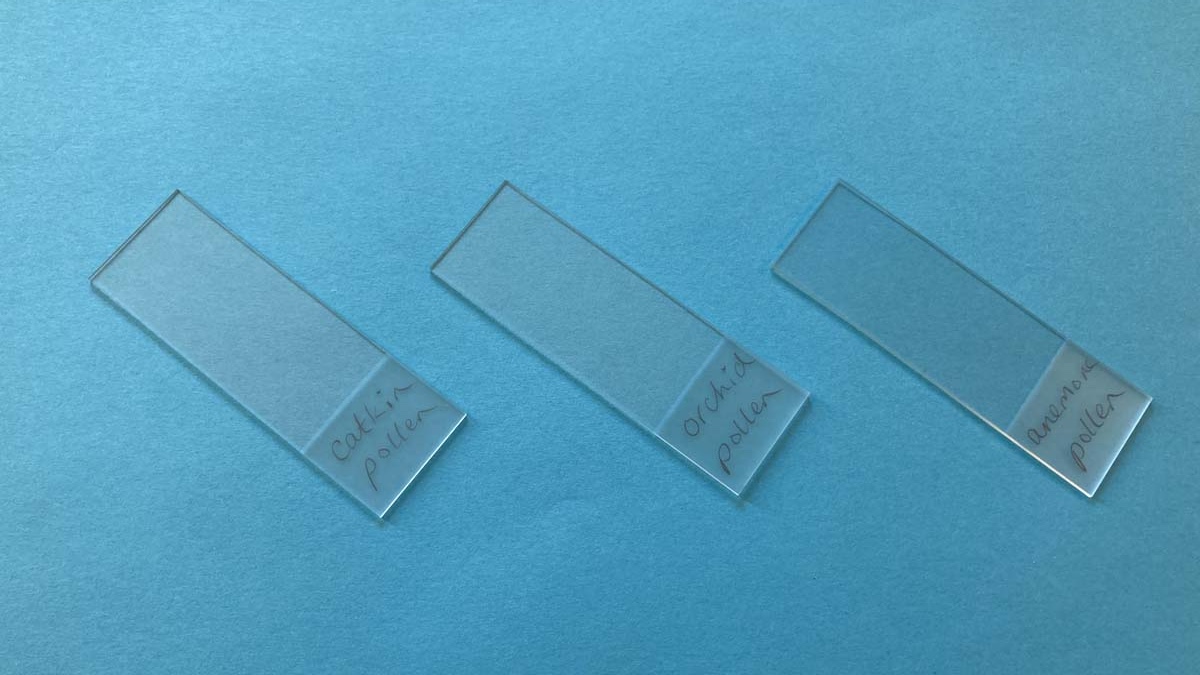
Perhaps also consider some add-ons. If you are passionate about discovering living organisms in water samples, why not treat yourself to some concave well slides? There are a range of single, double and triple well depression concave slides that have smooth edges and corners. There are also slides with frosted panels for writing on. These are useful for labeling, if samples are to be kept for future use.
Pipettes are essential for transferring liquids in tiny quantities, tweezers are ideal for transferring solid samples onto your slide, and mounted needles aid the correct positioning of cover slips to help prevent air bubbles.
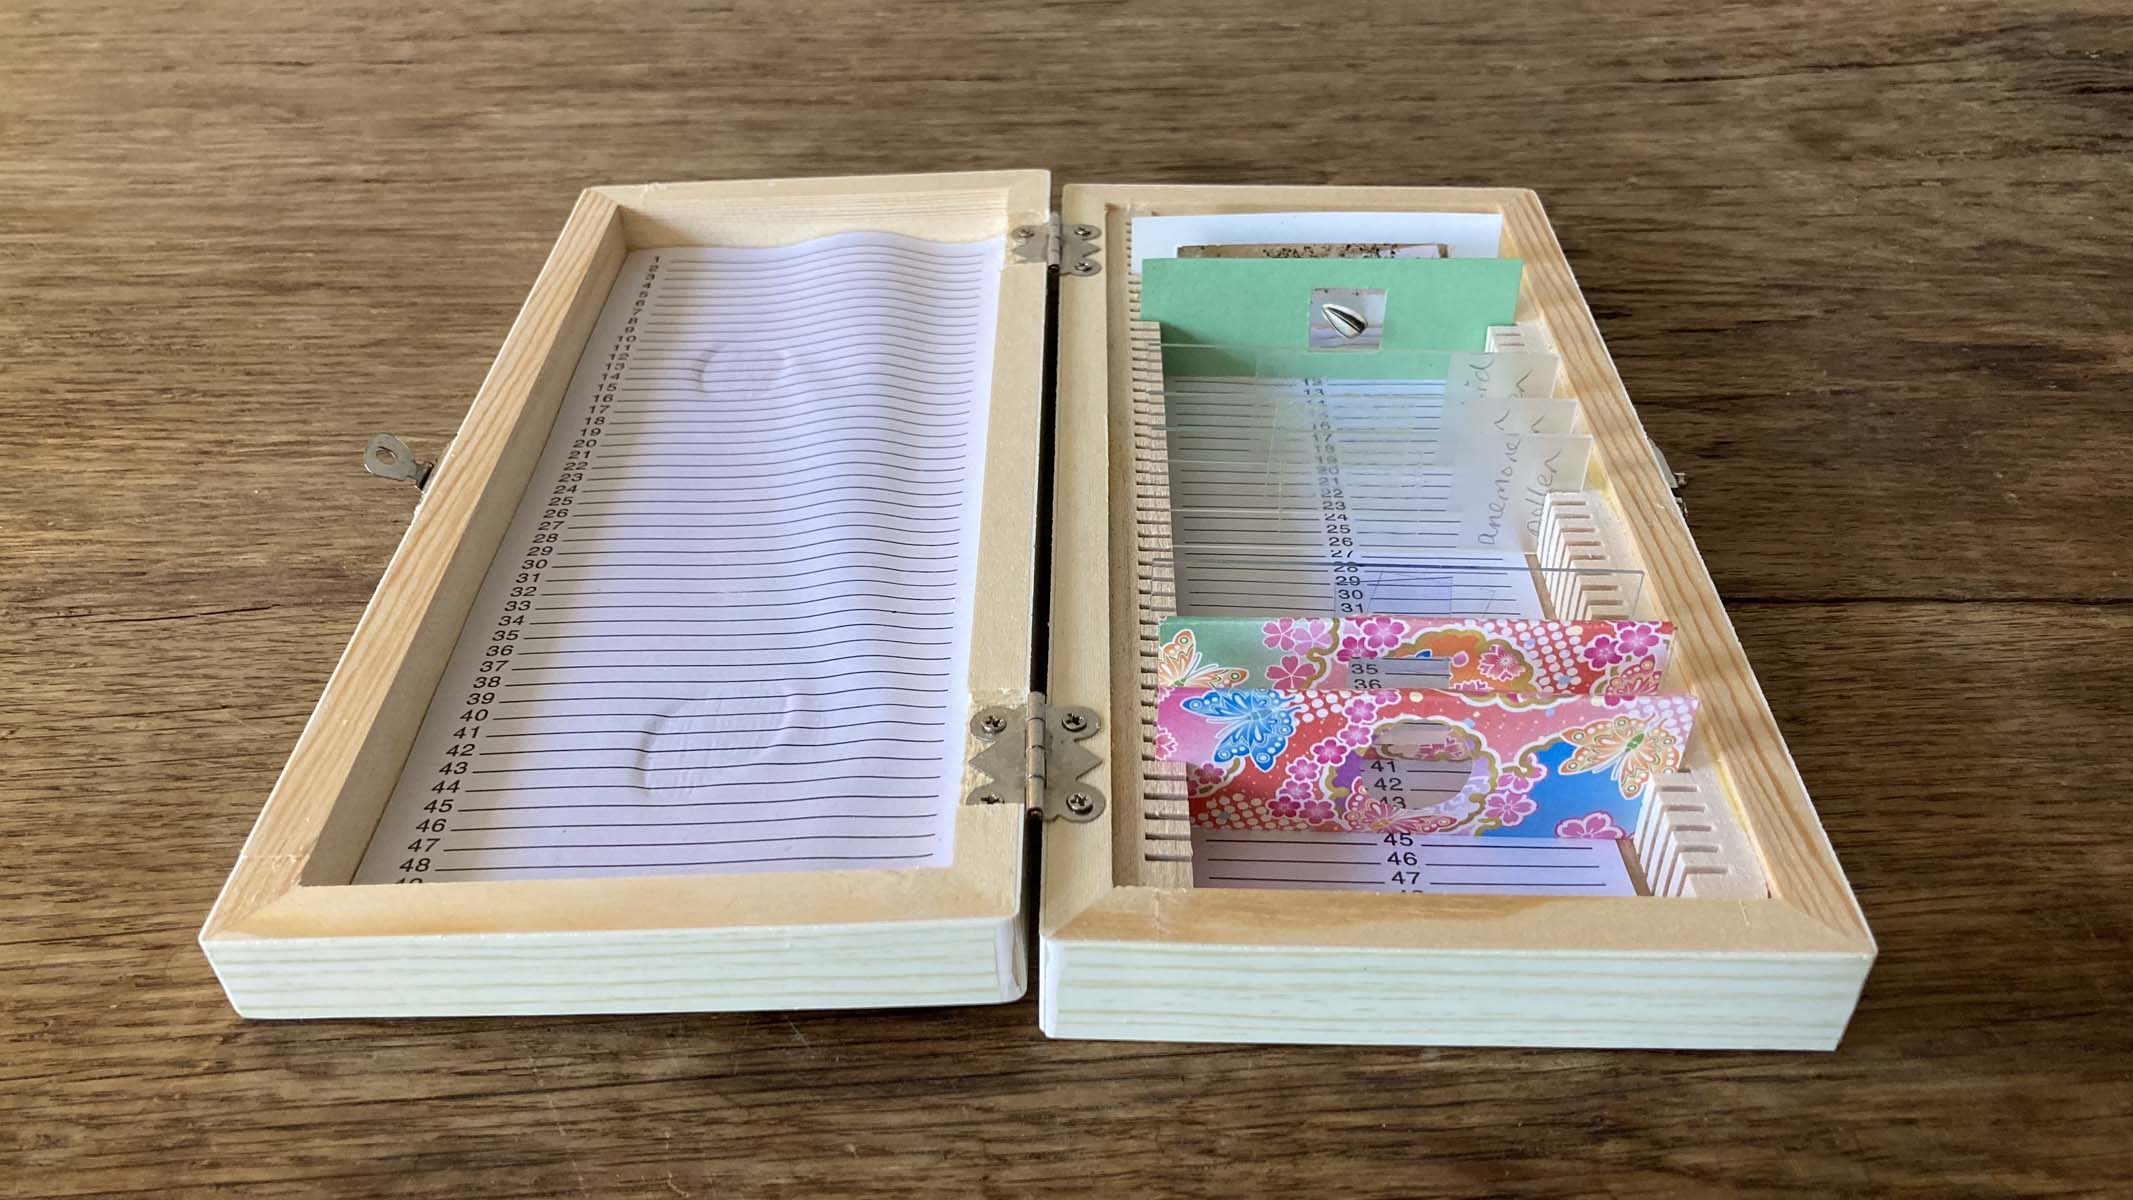
Finally, after you have prepared your own permanent slides, choose a fit-for-purpose box with slot dividers and numerical documentation card. This will help keep your slides organised, safe from damage and dust-free.
Dry mounting
The quickest and easiest way to observe something under the microscope is to do a dry mount. In its most basic form, this could simply involve placing your object under the microscope, putting the specimen directly onto the stage. Larger objects work well with this technique: torn paper, feathers, string, hair, natural fibres or wool, for example.
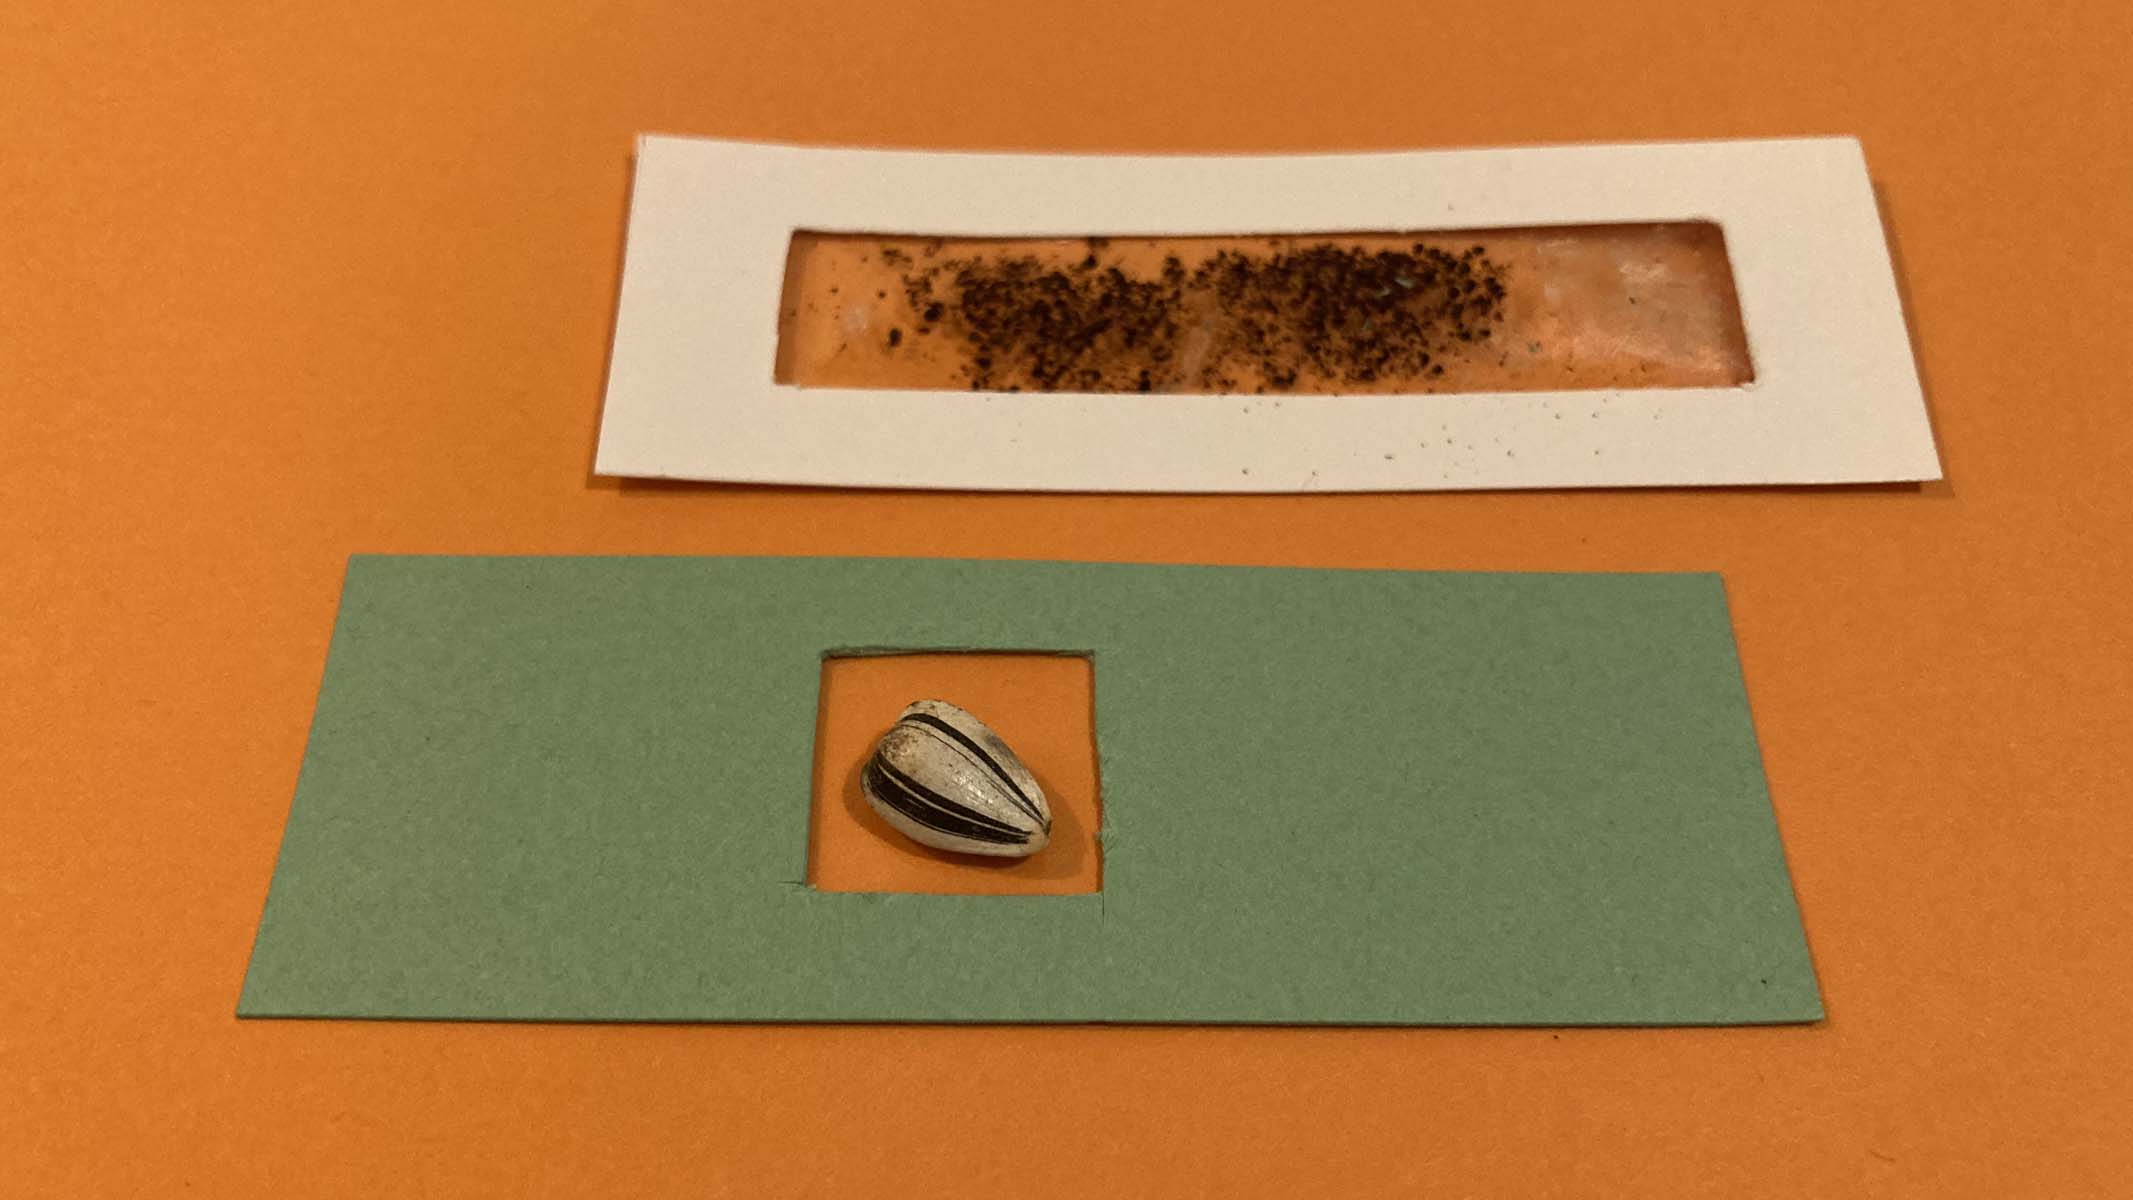
Smaller particles, in the form of separate granules, would benefit from being placed onto a slide before being placed onto the stage: they are much smaller and lighter, so could easily be dislodged. They also need a platform so they can be moved around the stage effectively. Try the following dry mount samples: pollen, soil, powders, dust, sand, sugar, salt.
It can be beneficial to cover your samples with a cover slip, so they do not blow away, or for safety if they pose a risk of contamination, such as mould or bacteria. A top layer can also flatten out your sample, to make focusing easier when the specimen lies within the same horizontal plane.
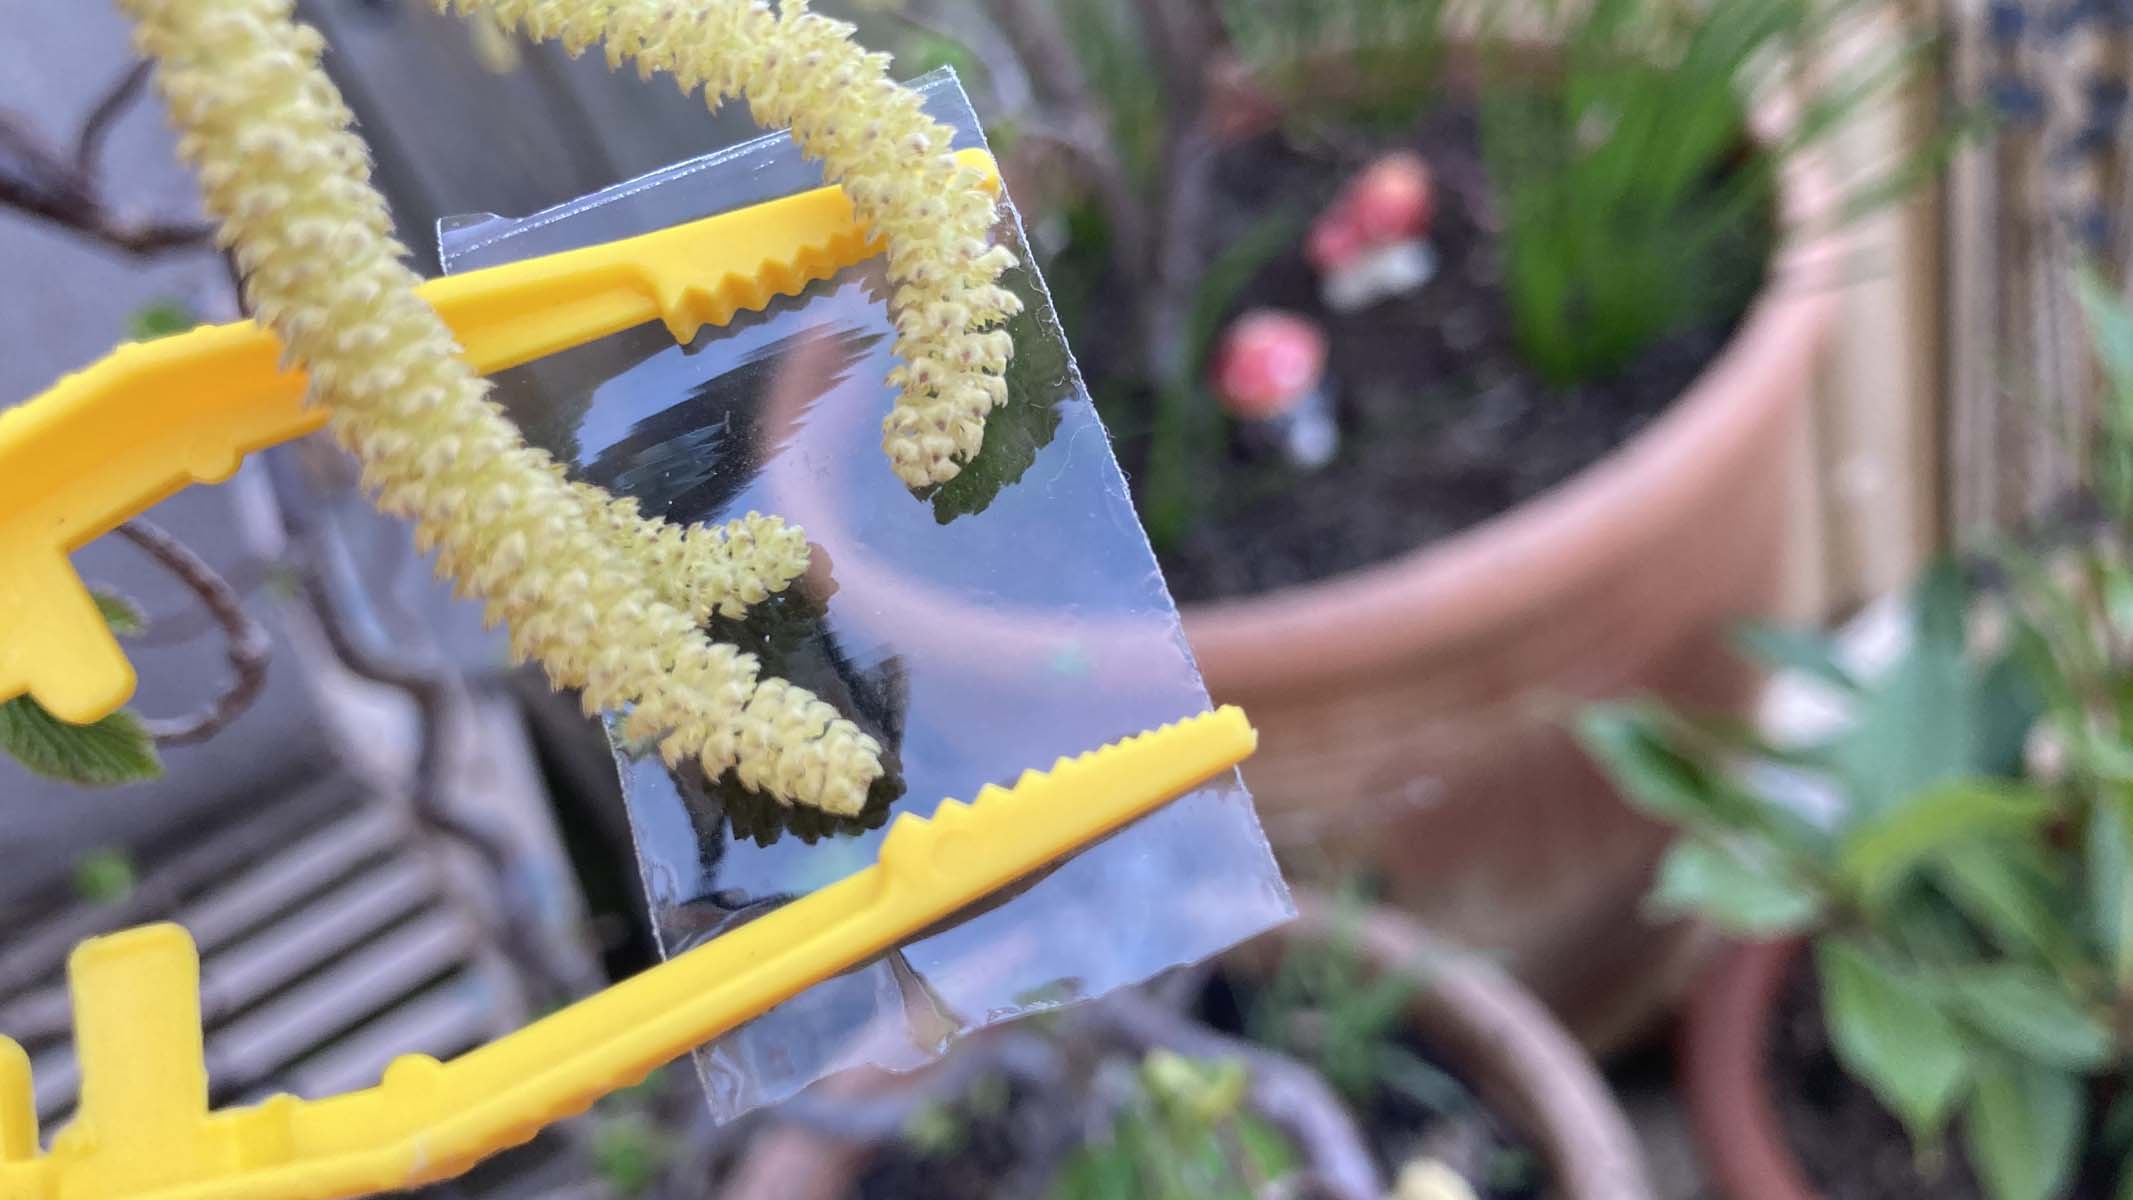
An alternative to a glass coverslip is to use Scotch tape. As well as creating a barrier between the specimen and the objective lens, Scotch tape’s sticky property can be utilised to adhere matter and transfer it effectively to the slide.
Wet mounting
Substances that are prone to dehydration will need to be wet mounted. Adding a drop of liquid to your sample will mean that it doesn’t degrade as quickly. This is particularly important for biological tissues and cells.
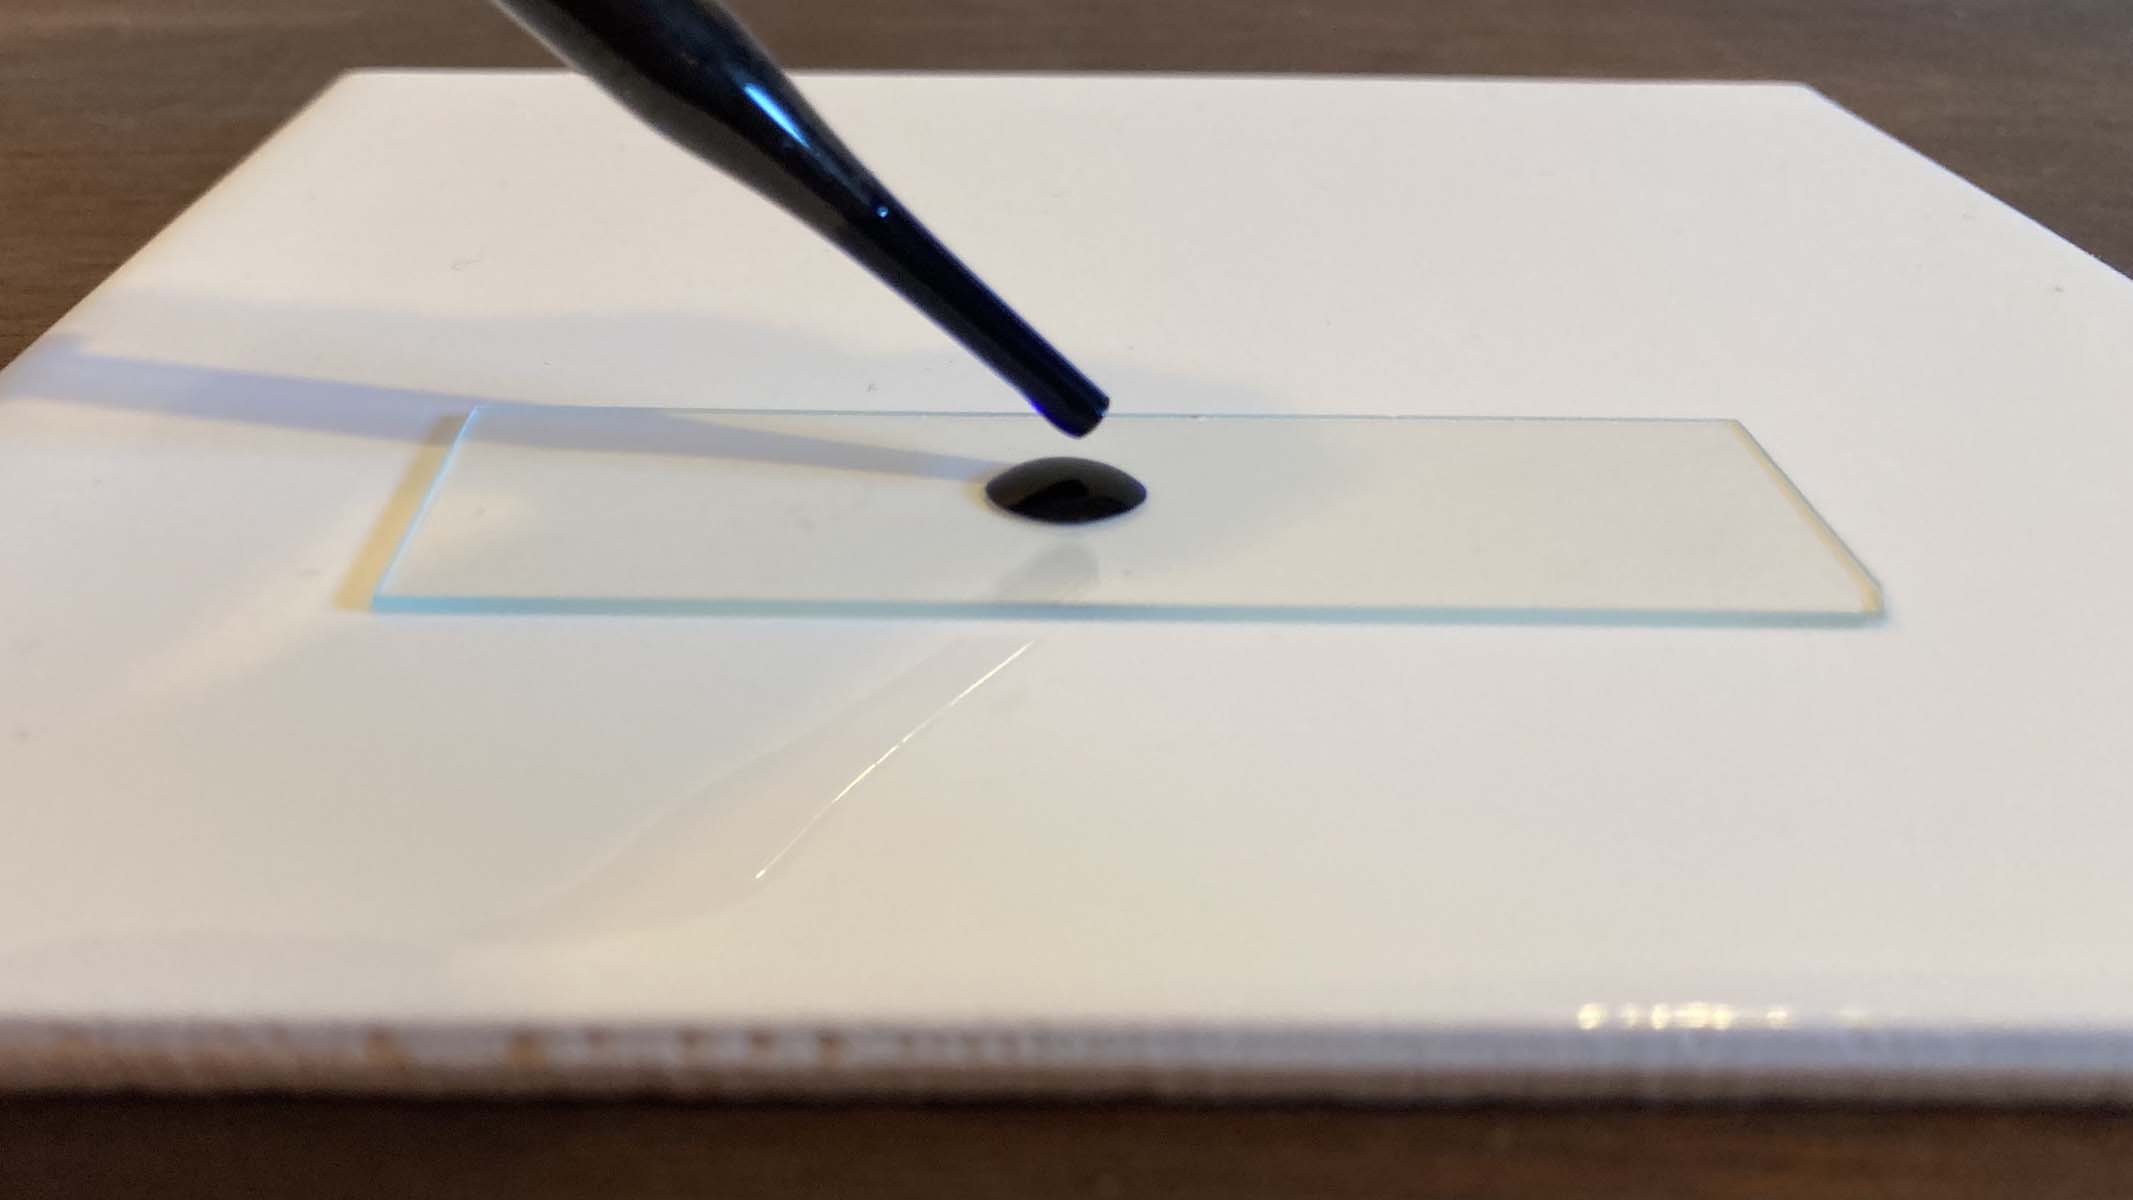
Water is commonly used for wet mounts. Saline is ideal for preserving the cell membranes of bacteria, while glycerine can help prevent dryness and shrinkage and is used for plant samples, including pollen. In any case, it is important to use only a small drop of liquid so that it does not bleed out beyond the edges of the coverslip.
Living creatures will also need to be mounted with some water from their environment. This can be done as a droplet onto a slide, with a coverslip on top, or into a depressed concave well. Purchase some plastic pipettes so that you can transfer tiny quantities of liquids while minimising the risk of harm to living creatures.
We recommend purchasing a few stains to take your home microscopy to the next level. Acting as a wet mount medium, a stain will also have a specific purpose, due to the substance that it will be reacting with, highlighting precise cell structures and improving visibility of organelles.
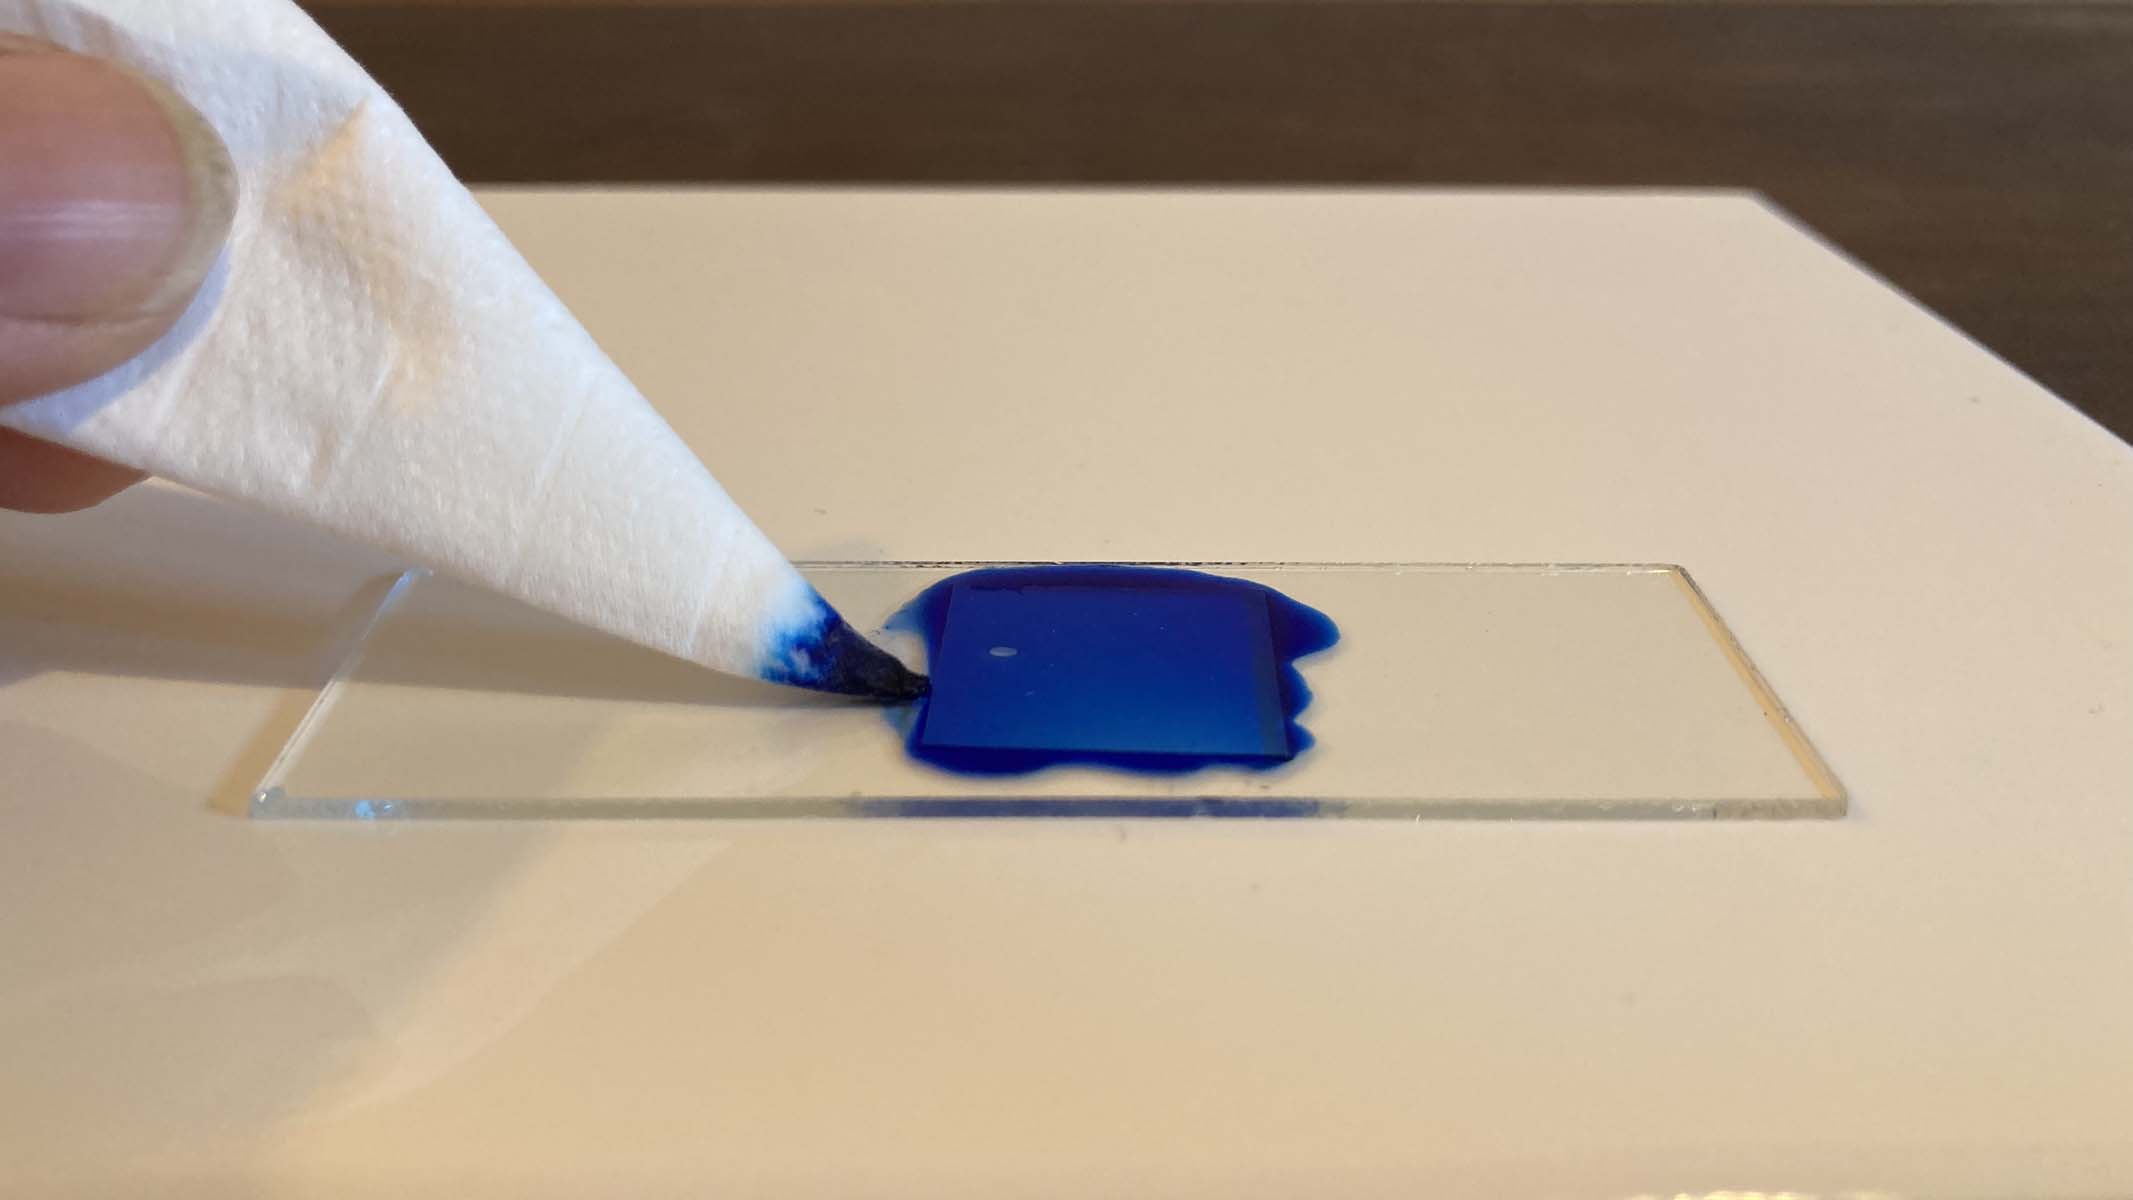
Iodine turns blue-black in the presence of starch, and is particularly useful when observing plant cells as it defines cell membranes and nuclei. Methylene blue is commonly used to increase contrast between cells and their background, which is why it is ideal for examining cheek cells. Eosin stains collagen, muscle, cytoplasm and red blood cells.
Using a coverslip
Coverslips are small, extremely thin glass plates that are used to cover your sample, keep it secure, contain the stain and prevent the objective lens from coming into contact with the specimen. They are incredibly delicate, and so are easily broken.
Being so fragile, they are more hazardous than the slide itself. Adults should take care to remove coverslips from their container before they are used by children. Honing your coverslip technique is important in order to preserve the sample without squashing it, avoid bubbles and contain the stain.
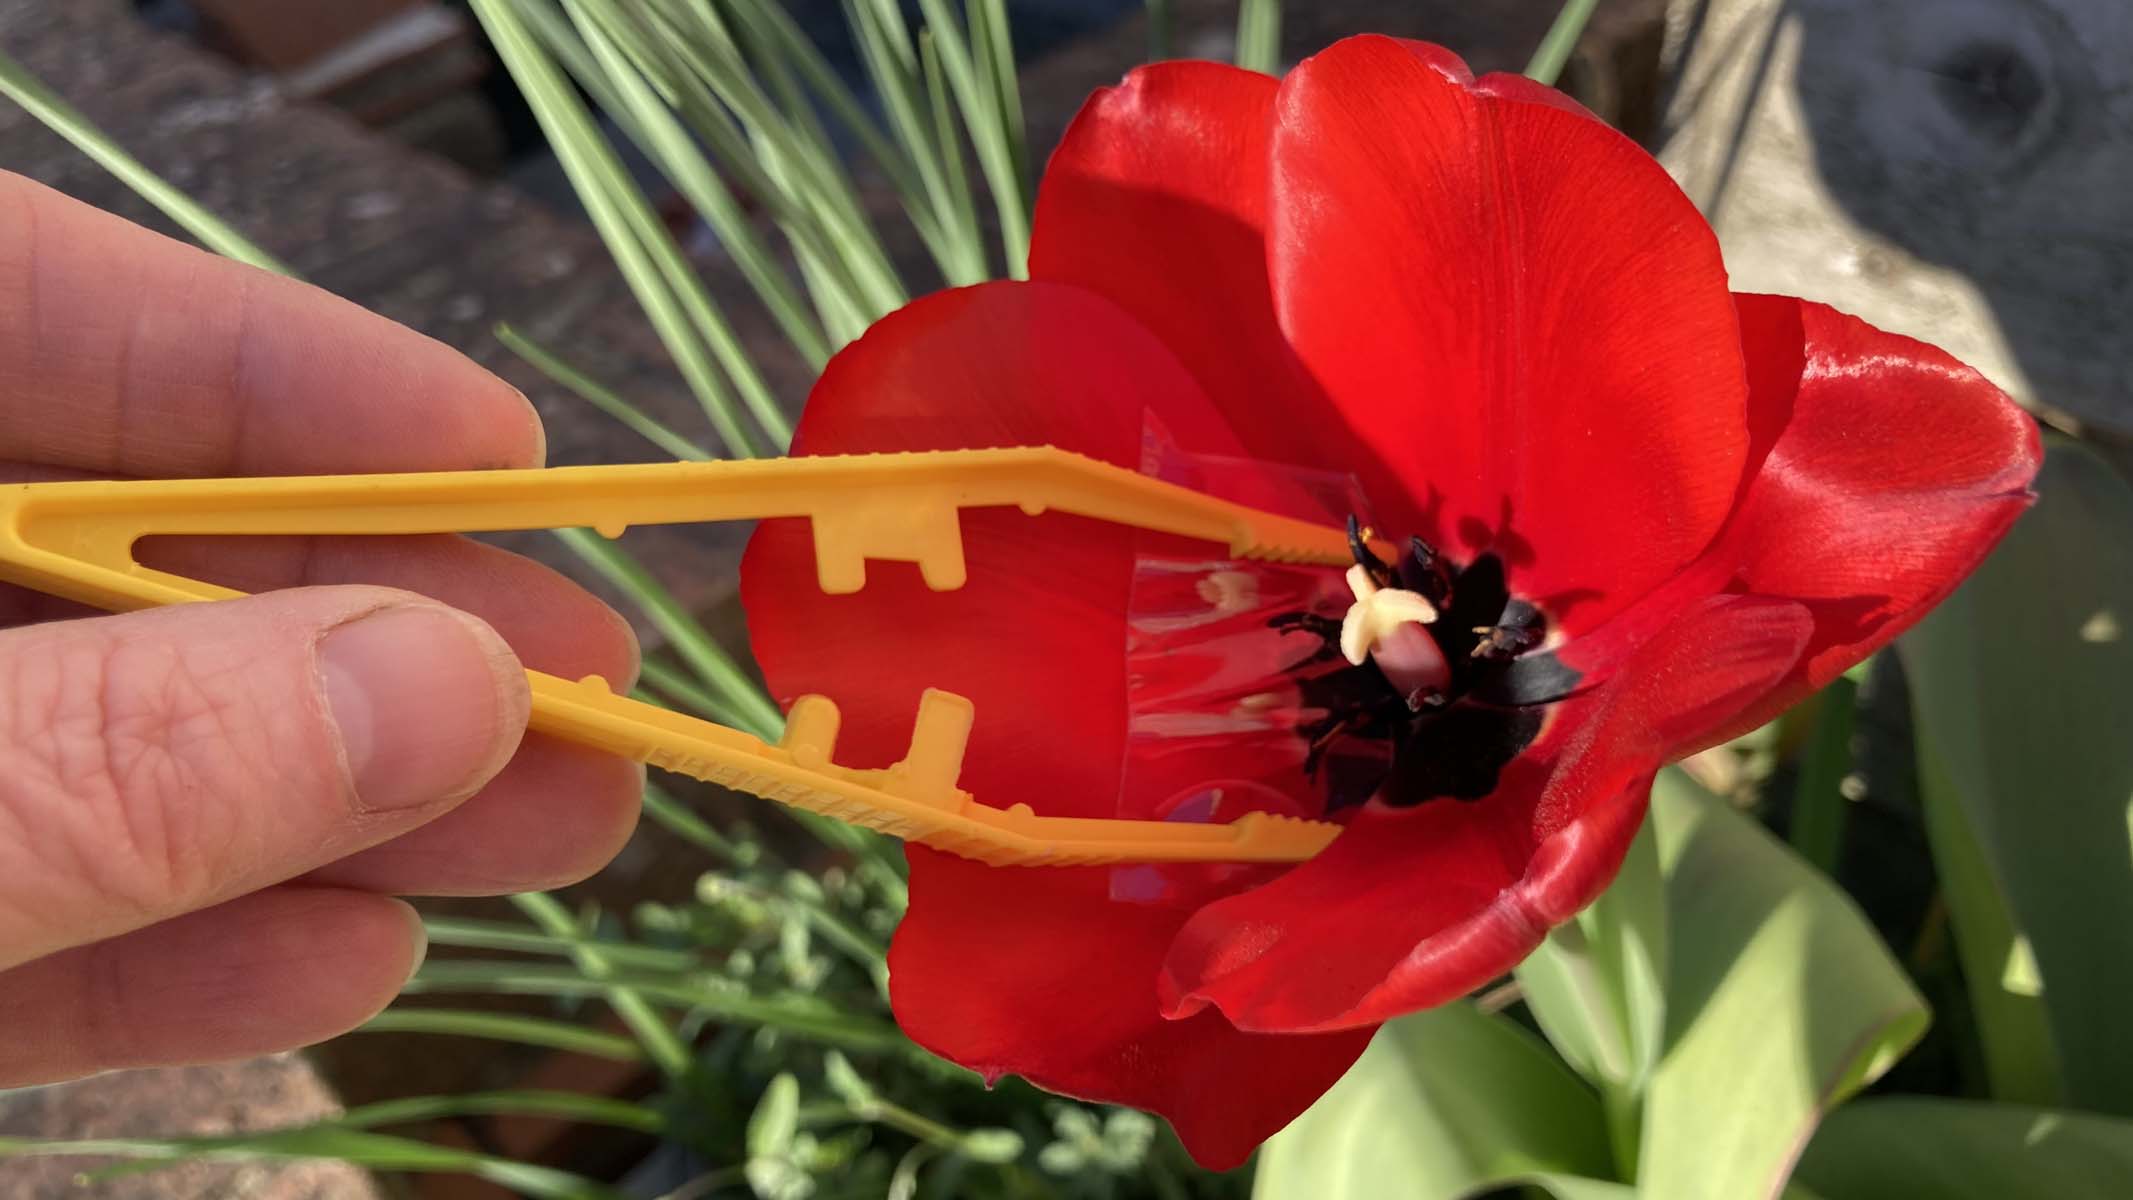
After the sample has been transferred onto the slide and one drop of the appropriate stain has been pipetted onto it, the coverslip must be placed on one edge, next to the prepared sample. Use a mounted needle to hold the coverslip at a 45 degree angle. Slowly and gently lower the coverslip so that it falls onto the specimen. Do not move it or press it down. As long as you keep the slide level, surface tension will hold the coverslip in place.
If you have used the correct quantity of stain, it should spread out to the edges of the coverslip without leaking out from underneath. If there is any excess, use the torn edge of some tissue to absorb it, taking care not to remove too much.
These temporary wet mount slides can easily be washed, dried and reused, taking care to disinfect any that have had body tissue or saliva on them. Alternatively, if you wish to make permanent slides, try setting your sample into a drop of clear nail varnish before adding a coverslip.
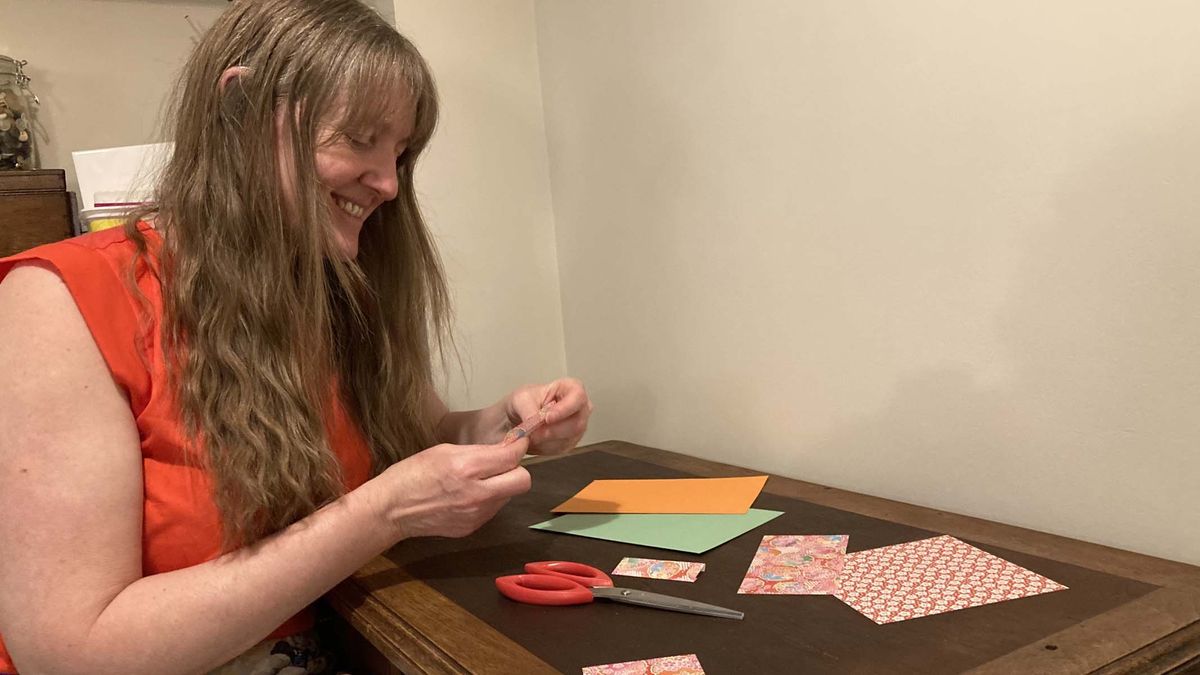
Crafty alternatives
If you find yourself without any glass slides, or if you just fancy being a little creative, there are a few ways of making ones with everyday household items.
Laminating is an excellent way to preserve flat samples that you can keep permanently. Feathers, hairs, sand, pollen and other dry samples work excellently. If you want to preserve and laminate biological tissues like petals, leaves, insect wings or anthers, try pressing them first. This will flatten them and also dehydrate them, to prevent them going mouldy. Why not purchase some credit card-sized laminating pouches for this specific purpose?
As previously mentioned, Scotch tape can work brilliantly for picking up or transferring very small samples. Instead of sticking them to a slide, you can stick the tape directly onto a piece of stiff card that has a 1cm hole cut into it. This should be rigid enough to hold the tape flat. Cut to 75mm x 25mm, it will be the same size as a standard glass slide.
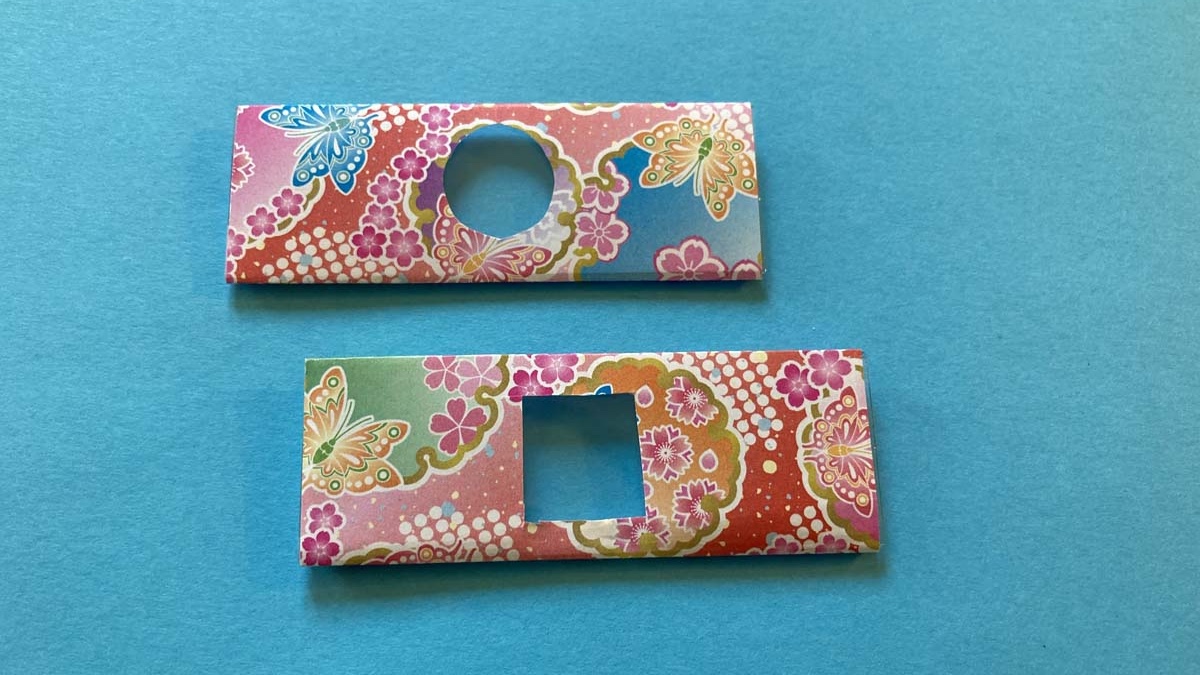
Another creative idea is to use a themed paper wrap for your slide. In the 1800s, in Paris, paper slide wraps were used to hold coverslips in place. Thereafter, the practice continued for aesthetic reasons. Paper wraps can be folded around the outside of your glass or plastic, to decorate permanent slides. Alternatively, a paper sheet could be cut and sandwiched between your laminates, with the sample inside a circular cutout. Have a little fun here: there’s no reason that scientists can’t be artistic too!